Sustainable Decking Materials: Eco-Friendly Choices for Your Outdoor Space
The Art of Surface Preparation: The Foundation of Flawless Painting and Carpentry
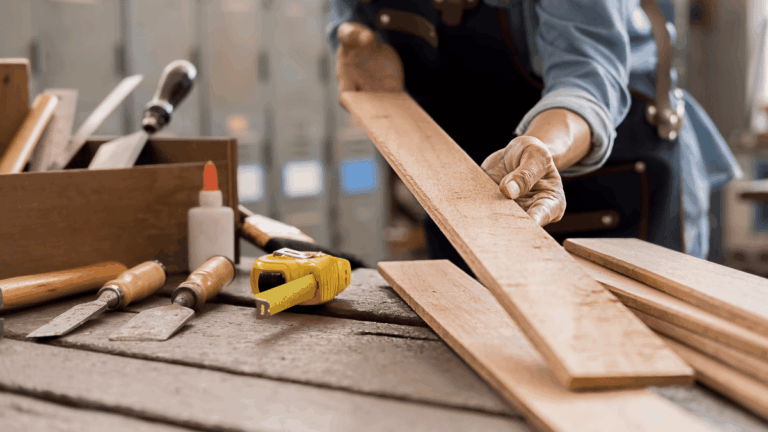
In painting and carpentry, the difference between amateurish frustration and professional-grade results lies beneath the surface—literally. Surface preparation is the unsung hero of home improvement, accounting for 75-80% of a project’s success. Yet, it’s often rushed or skipped in the eagerness to see visible progress. Whether applying a coat of paint or installing custom trim, failing to properly prepare surfaces leads to peeling paint, uneven finishes, warped wood, and wasted time/money. For DIYers and pros alike, mastering this foundational step ensures durability, aesthetics, and long-term value. This article demystifies the science and sweat behind effective prep work, transforming your next project from mediocre to magnificent.
Why “Good Enough” Prep Isn’t Good Enough
Surface prep isn’t just cleaning—it’s about creating optimal conditions for adhesion. Paint bonds mechanically to microscopic pores and imperfections; without a clean, stable base, it lifts or bubbles. Similarly, wood movement from moisture or temperature changes causes cracks in joints or finishes if not accounted for. Key principles include:
- Adhesion Science: Contaminants like grease or dust create barriers. Sanding opens pores for paint penetration.
- Moisture Management: Wood should be acclimated to room humidity (target: 8-12% moisture content) before cutting or finishing.
- Stability: Filler or primer stabilizes porous surfaces (e.g., drywall) to prevent uneven absorption.
Essential Tools and Materials: Your Prep Arsenal
Investing in the right tools prevents hours of rework. For painting, prioritize:
- Abrasive Tools: 80-220 grit sandpaper (coarse for stripping, fine for smoothing), sanding blocks, and pole sanders.
- Cleaning Agents: Trisodium phosphate (TSP) for degreasing walls, mineral spirits for wood resin.
- Repair Supplies: Wood filler for holes, spackle for drywall, and caulk for gaps.
For carpentry, add moisture meters, planers for flattening lumber, and quality fillers like epoxy for structural repairs.
Surface-Specific Prep Protocols
Wood:
- New Lumber: Sand progressively (120→220 grit), remove sawdust with tack cloth, apply pre-stain conditioner for even color.
- Painted Wood: Scrape loose paint, sand edges smooth, spot-prime bare spots with oil-based primer to block stains.
Drywall: Seal joints with mesh tape and compound, sand smooth, then apply PVA primer to prevent “flashing.”
Metal: Remove rust with wire brushes, degrease, and apply rust-inhibitive primer.
Critical Mistakes That Sabotage Your Work
Avoid these common errors:
- Skipping Dust Removal: Wipe surfaces with microfiber cloths after sanding—never rely on blowing dust.
- Ignoring Humidity: Painting above 85% humidity causes blushing; woodworking in dry conditions leads to joint gaps.
- Over-Sanding: On veneers or softwoods, excessive sanding burns through finishes or creates dips.
Pro Techniques for Impeccable Results
Elevate your prep with these expert tactics:
- The “Flashlight Test”: After sanding, shine a light parallel to the surface to reveal hidden scratches or dents.
- Wet-Sanding for Glassy Finishes: Use 400-grit sandpaper with water/oil on final paint coats to remove orange peel texture.
- Sealing End Grains: Apply sanding sealer to wood ends before priming—they absorb 3x more moisture, causing swelling.
Surface preparation is the cornerstone of craftsmanship in painting and carpentry—it demands patience but pays dividends in durability and beauty. Remember: no primer, paint, or joinery can compensate for a poorly prepped base. Commit to meticulous cleaning, repairing, and conditioning, and always let materials acclimate to your workspace. As a practical takeaway, dedicate 60% of your project timeline to prep work. When your sandpaper glides like butter and your primer lays down uniformly, you’ll know you’ve built a foundation worthy of a masterpiece. The true art isn’t just in the final stroke or cut; it’s in the invisible labor that makes it last.